Precaution before installation:
We recommend duplicating your theme, but if you know what you're doing, you can skip this step.
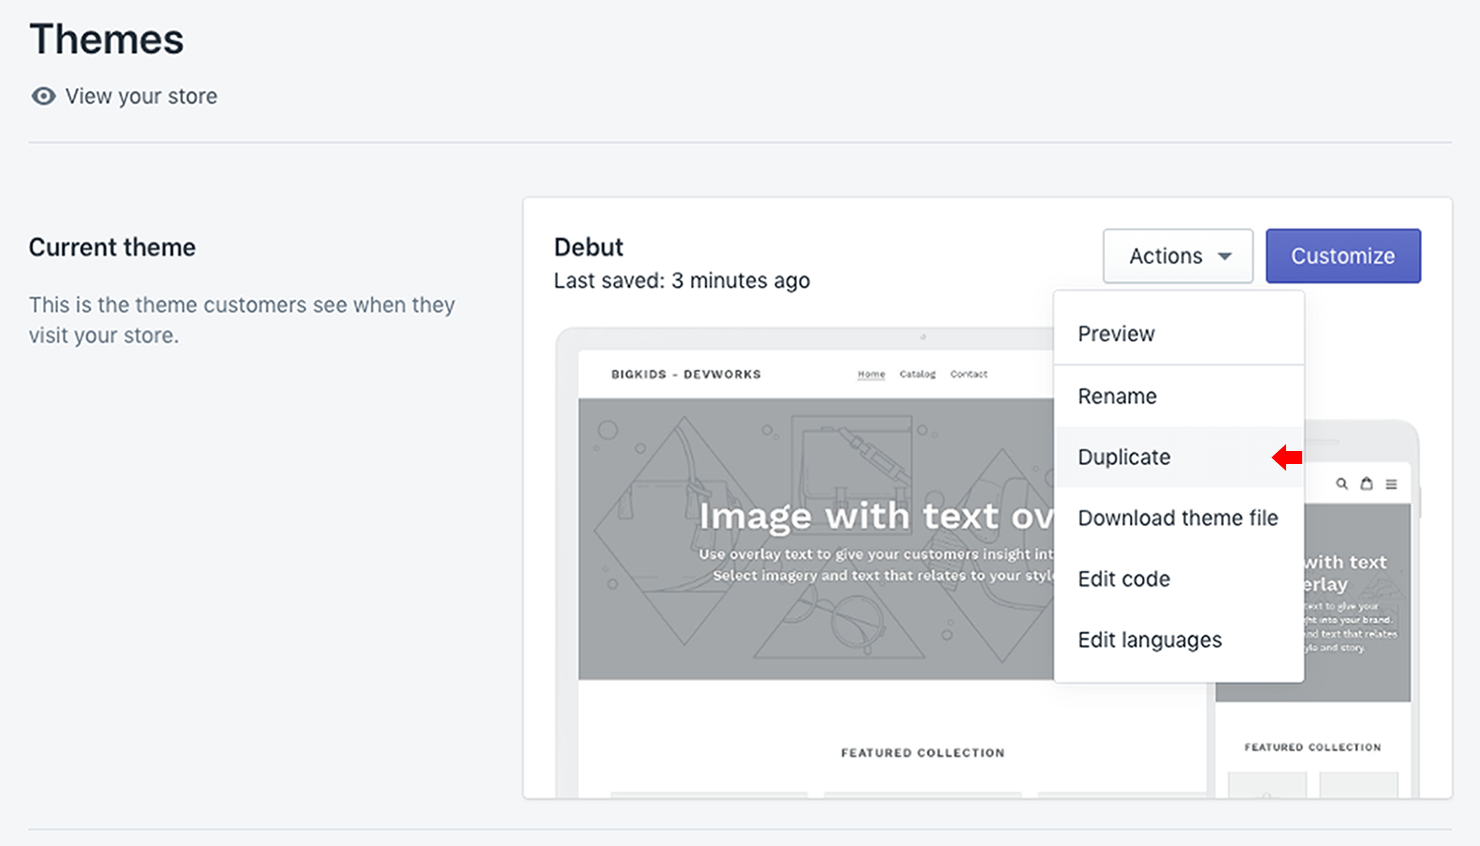
Duplicate your current theme
Before you customize a theme, it's a good idea to make a backup copy so that you can discard your changes and start again. First, backup the copy of the current theme to discard the changes if needed. Read shopify guide for more details.
To edit code of your theme:
Edit code of your current theme
After duplicating the theme from your Shopify admin, go to Online Store > Themes, find the current theme and click the Actions > Edit code

The code editor workspace shows the bunch of theme files logically sorted into several folders:

If you install a new theme:
Add a new snippet
If you've installed the theme and then added the app (the default use case), the file will be added automatically. If that is exactly your case, please go to the next section. Otherwise, please follow these instructions:
Add better_product_objects snippet
Open the Snippets folder and click the Add a new snippet option. The snippet name should be: better_product_objects

Fill it in with the code from below:
{% capture itemProducts %}{% for item in cart.items %}{{ item.product | json}}{% unless forloop.last %}|*BP*|{% endunless %}{% endfor %}{% endcapture %}
{% assign itemProducts = itemProducts | split:  "|*BP*|" %}
{% capture productCollections %}{% for collection in product.collections %}{{ collection.id | json }}{% unless forloop.last %}|*BP*|{% endunless %}{% endfor %}{% endcapture %}
{% assign productCollections = productCollections | split: "|*BP*|" %}
<script type="text/javascript">
    window.betterProductObjects = {
    product: {{ product | json }},
    productCollections: {{ productCollections | json }},
    cart: {{ cart | json }},
    cartProducts: {{ itemProducts | json }},
    templateName: {{ template.name | json }},
    shop: {
        locale: {{ shop.locale | json }},
        domain: {{ shop.permanent_domain | json }},
        money_format : {{ shop.money_format  | json }},
        money_with_currency_format : {{ shop.money_with_currency_format | json }}
    }
};
</script>

When done, click Save.
Installation:
Edit theme.liquid layout
Open the Layout folder, and click the theme.liquid file.
Find the code:
</body>
in most cases, it will be at the end of the document.
Before the line enter :
{% include 'better_product_objects' %}
as depicted below and click the Save button.

Optional installation:
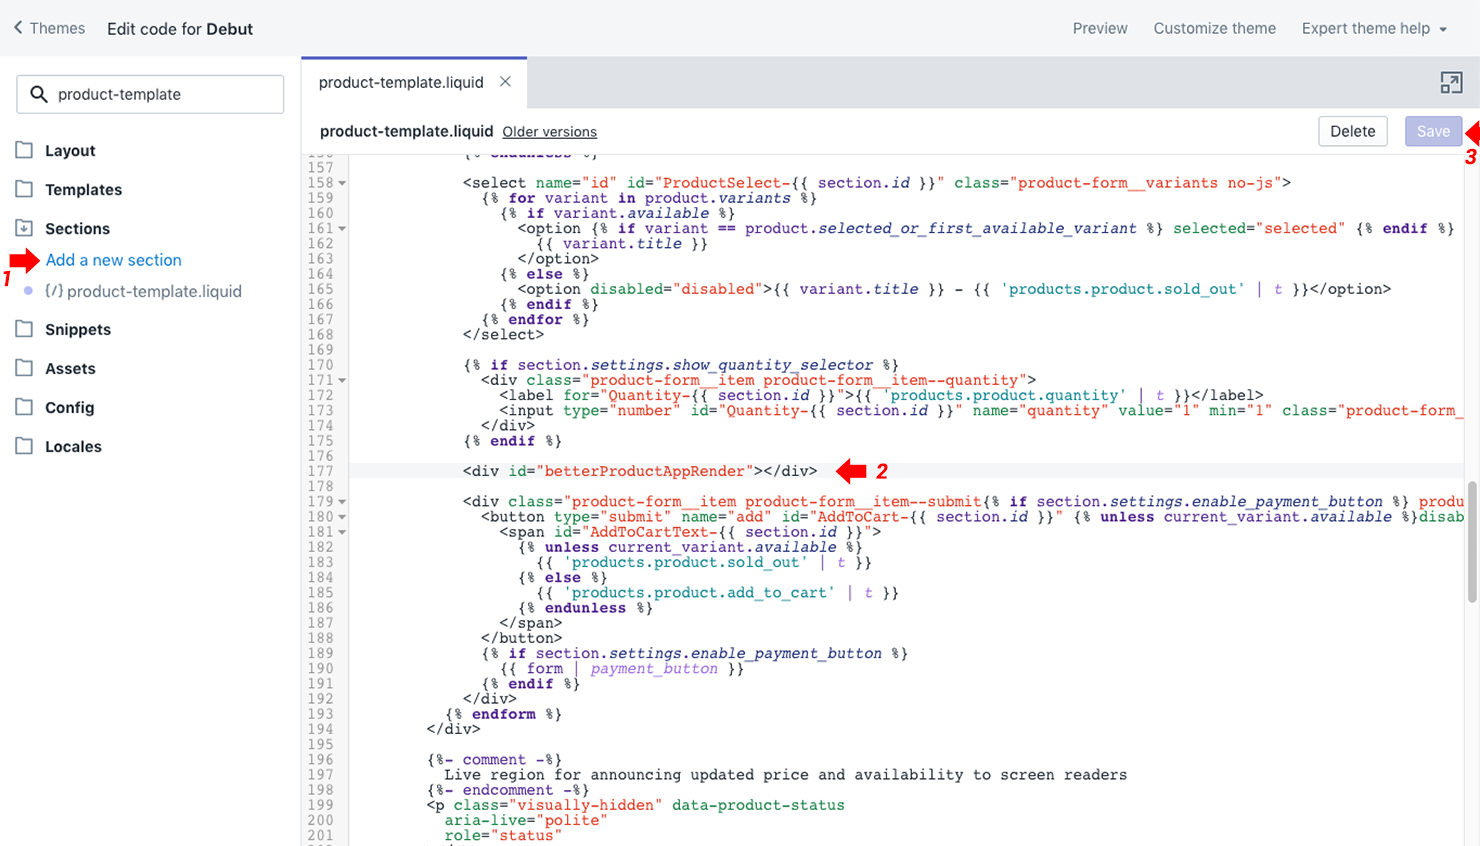
PRODUCT PAGE
Edit product-template.liquid file
Open the Sections folder, and click the product-template.liquid file.
Find the block that is wrapped in the <form>...</form> tag. If you locate several forms in the file, you will need to find the one with the 'Add to cart' button. For instance, in the default theme, it will be:
<form action="/cart/add" ... >
 ...
</form>
or
{% form 'product'', product,'  ... %}
 ...
{% endform %}
and add
<div id="betterProductAppRender"></div>
as depicted below and click the Save button.
CART PAGE
Edit cart-template.liquid or cart.liquid file
Open the Sections folder, and click the cart-template.liquid or cart.liquid file.
Find the block that is wrapped in the <form>...</form> tag.
<form action="/cart" ... >
 ...
</form>
Locate this code:
<textarea name="note id="CartSpecialInstructions" ... >{{cart.note}}</textarea>
After it, enter the code:
<div id="betterProductAppRender"></div>
as depicted below and click the Save button.

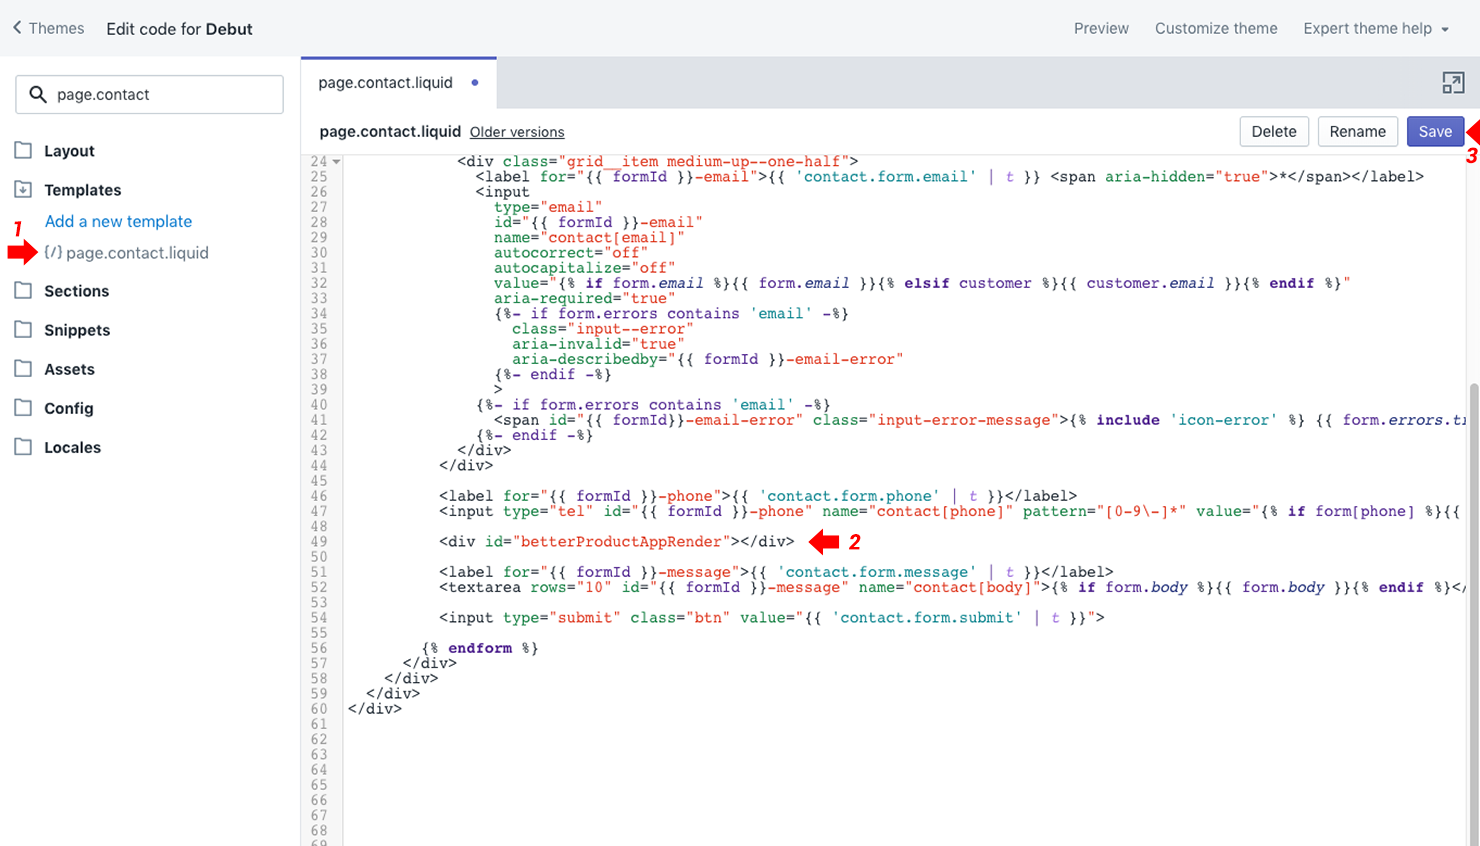
CONTACT PAGE
Edit page.contact.liquid file
Open the Sections folder, and click the page.contact.liquid file.
Find the block that is wrapped in the <form>...</form> tag.
<form action="/contact" ... >
 ...
</form>
or
{% form 'contact',   ... %}
 ...
{% endform %}
Locate this code:
<label htmlFor="{{ formId }}-message">{{ 'contact.form.message' | t }}</label>
<textarea rows="10" id="{{ formId }}-message" name="contact[body]">{% if form.body %}{{ form.body }}{% endif %}</textarea>
Before it, enter the code:
<div id="betterProductAppRender"></div>
as depicted below and click the Save button.